

Let's face it. Using a text editor and deploying your application into a container is not everyone's development style, even when using the excellent emacs editor. Many developers like to use an IDE like Eclipse. M.E.T.A. supports this style of application development, though some developers consider the arguments for an IDE to be the same as for a debugger.
The remainder of this page uses Eclipse as IDE because there is good integration between Maven and Eclipse. Examples for other IDEs like netBeans, IntelliJ IDEA, JBuilder or any other IDEs are welcome.
Setting up Eclipse and Tomcat for M.E.T.A. is very easy to do:
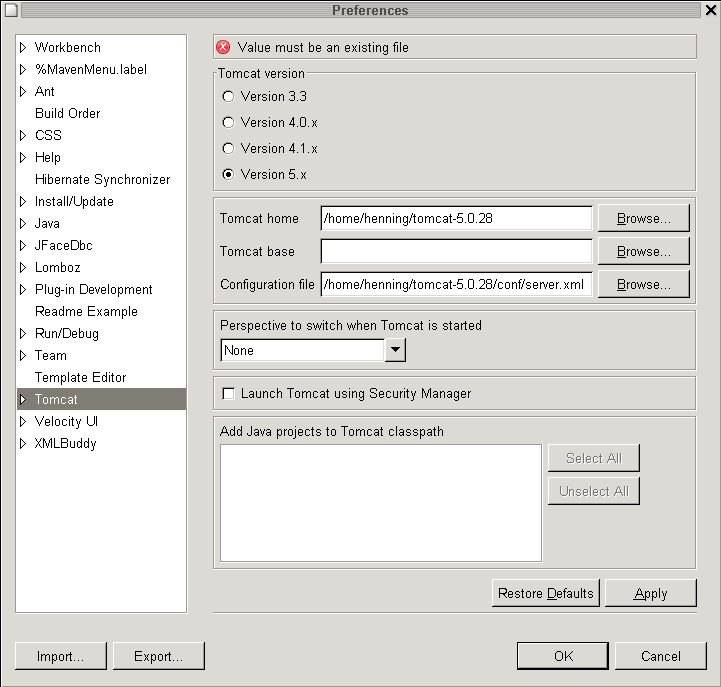
Now configure Eclipse to your installed tomcat by setting its home directory and server.xml location in "Window" -> "Preferences" -> "Tomcat":
Create a new Turbine application by running
maven -Dturbine.app.name=helloworld -Dturbine.plugin.mode=inplace -Dturbine.plugin.inplace.dir=tomcat turbine:setup
Build the OM Peer classes:
maven torque:om
The new application must be compiled once with the M.E.T.A. plugin. This makes sure that all dependencies from the project descriptor get copied into the web application lib directory. If you forget this step, you will get a lot of missing dependencies in Eclipse.
maven java:compile
We must prepare our application for Eclipse. Maven offers a goal which builds the project description and classpath files:
maven eclipse
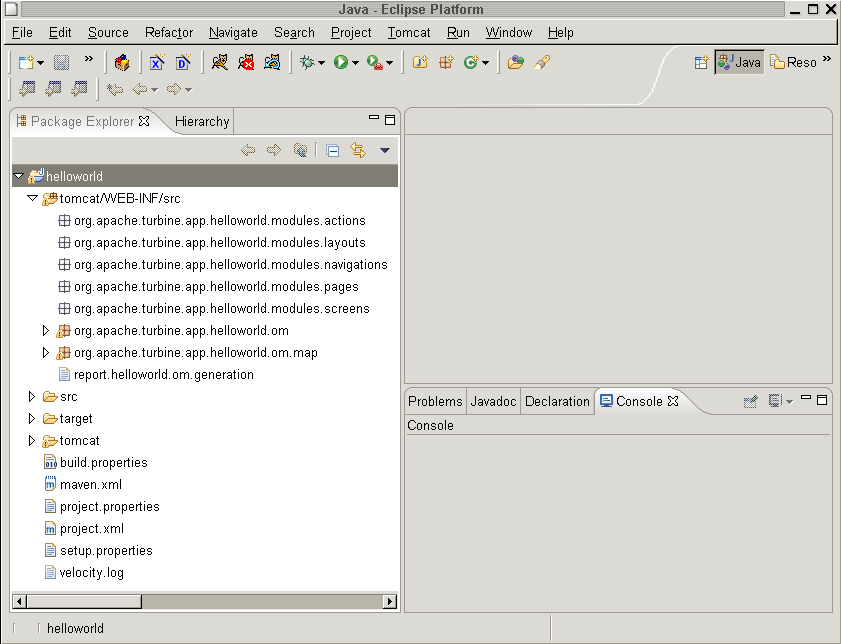
Import your application into Eclipse by selecting "File" -> "Import" -> "Existing Project into Workspace" and enter the location of your new Turbine application into the Wizard. The resulting tree should look like this:
Finally, tell Eclipse that your application is a Tomcat application and should be run in the web container. Highlight your application and select "File" -> "Properties" from the Menu to open the Properties Dialog for your application. Select the "Tomcat" properties:
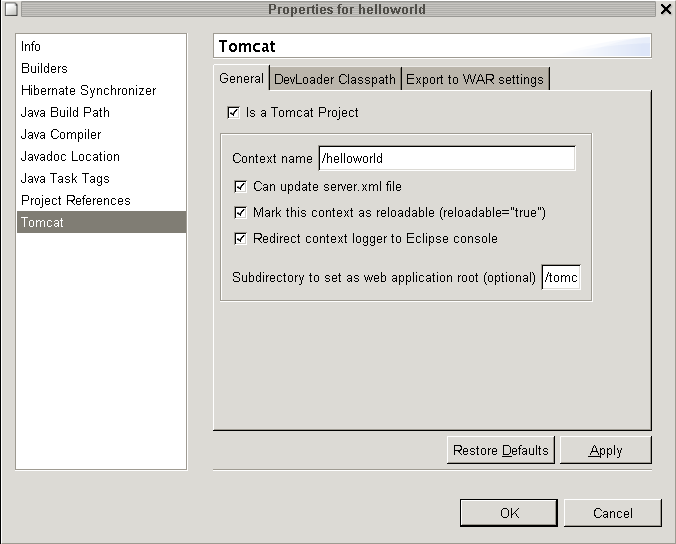
Enter the desired context name in the first text box. In the
second text box, the application root is entered. This must be the
same value as the turbine.plugin.inplace.dir value when
setting up the Turbine application. Make sure that
you have leading slashes in both text boxes! If you forget these,
the Tomcat plugin will not work correctly. Also, check all three checkboxes
to allow Eclipse to manage your application inside Tomcat and to redirect the
catalina.out log file into the Eclipse console.
Now you can launch your application through Tomcat by using the "Tomcat" menu from Eclipse. You can set breakpoints in your classes and debug directly in the IDE. Maven and the M.E.T.A. environment have been used for setting up the application but are no longer needed for developing inside the IDE.