Table of Contents
Here we'll generate the Java classes from the model that was created in the previous section. CayenneModeler can be used to also generate the database schema, but since we specified "CreateIfNoSchemaStrategy" earlier when we created a DataNode, we'll skip the database schema step. Still be aware that you can do it if you need to via "Tools > Create Database Schema".
Select "Tools > Generate Classes" menu.
For "Type" select "Standard Persistent Objects", if it is not already selected.
For the "Output Directory" select "src/main/java" folder under your Eclipse project folder (this is a "peer" location to the cayenne-*.xml location we selected before).
Click on "Entities" tab and check the "Check All Classes" checkbox (unless it is already checked and reads "Uncheck all Classes").
Click "Generate"
Now go back to Eclipse, right click on "tutorial" project and select "Refresh" - you should see pairs of classes generated for each mapped entity. You probably also see that there's a bunch of red squiggles next to the newly generated Java classes in Eclipse. This is because our project does not include Cayenne as a Maven dependency yet. Let's fix it now by adding "cayenne-server" artifact in the bottom of the pom.xml file. The resulting POM should look like this:
<project xmlns="http://maven.apache.org/POM/4.0.0" xmlns:xsi="http://www.w3.org/2001/XMLSchema-instance"
        xsi:schemaLocation="http://maven.apache.org/POM/4.0.0 http://maven.apache.org/maven-v4_0_0.xsd">
    <modelVersion>4.0.0</modelVersion>
    <groupId>org.example.cayenne</groupId>
    <artifactId>tutorial</artifactId>
    <version>0.0.1-SNAPSHOT</version>

    <dependencies>
        <dependency>
            <groupId>org.apache.cayenne</groupId>
            <artifactId>cayenne-server</artifactId>
   <!-- Here specify the version of Cayenne you are actually using -->
            <version>3.1M3</version>
        </dependency>
    </dependencies>
</project>
Your computer must be connected to the internet. Once you save the pom.xml, Eclipse will download the needed Cayenne jar file and add it to the project build path. As a result, all the errors should disappear.
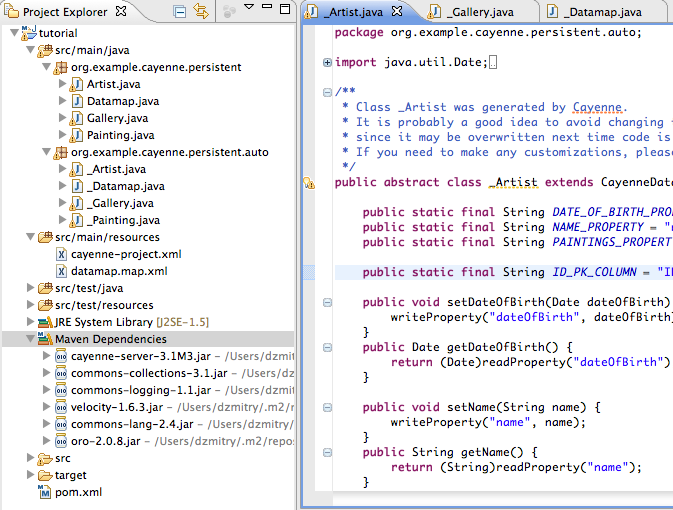
Now let's check the entity class pairs. Each one is made of a superclass (e.g. Artist) and a subclass (e.g. Artist). You should not modify the superclasses whose names start with "_" (underscore), as they will be replaced on subsequent generator runs. Instead all custom logic should be placed in the subclasses in "org.example.cayenne.persistent" package - those will never be overwritten by the class generator.
Note
Class Generation Hint Often you'd start by generating classes from the Modeler, but at the later stages of the project the generation is usually automated either via Ant cgen task or Maven cgen mojo. All three methods are interchangeable, however Ant and Maven methods would ensure that you never forget to regenerate classes on mapping changes, as they are integrated into the build cycle.