Table of Contents
Creation of a new Eclipse project has been discussed in some details in "Getting Started with Cayenne" guide, so we will omit the screenshots for the common parts.
In Eclipse select "File > New > Other..." and then "Maven > Maven Project". Click "Next". On the following screen check "Create a simple project" checkbox and click "Next" again. In the dialog shown on the screenshot below, enter "org.example.cayenne" for the "Group Id" and "tutorial-rop-client" for the "Artifact Id" (both without the quotes) and click "Finish".
Now you should have a new empty project in the Eclipse workspace. Check that the project Java compiler settings are correct. Rightclick on the "tutorial-rop-client" project, select "Properties > Java Compiler" and ensure that "Compiler compliance level" is at least 1.5 (some versions of Maven plugin seem to be setting it to 1.4 by default).
The client doesn't need the XML ORM mapping, as it is loaded from the server. However it needs the client-side Java classes. Let's generate them from the existing mapping:
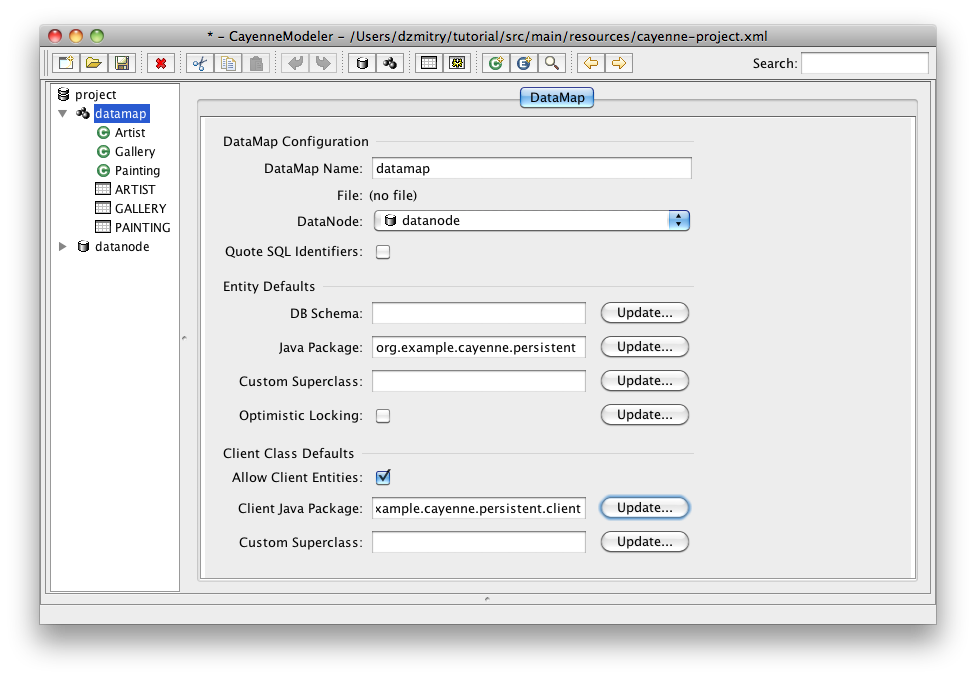
Start CayenneModeler and open cayenne.xml from the "tutorial" project (located under "tutorial/src/main/resources", unless it is already open.
Select the "datamap" DataMap and check "Allow Client Entities" checkbox.
Enter "org.example.cayenne.persistent.client" for the "Client Java Package" and click "Update.." button next to the field to refresh the client package of all entities.
Select "Tools > Generate Classes" menu.
For "Type" select "Client Persistent Objects".
For the "Output Directory" select "tutorial-rop-client/src/main/java" folder (as client classes should go in the client project).
Click on "Entities" tab and check the "Check All Classes" checkbox (unless it is already checked and reads "Uncheck all Classes").
Click "Generate".
Now go back to Eclipse, right click on "tutorial-rop-client" project and select "Refresh" - you should see pairs of classes generated for each mapped entity, same as on the server. And again, we see a bunch of errors in those classes. Let's fix it now by adding two dependencies, "cayenne-client" and "resin-hessian", in the bottom of the pom.xml file. We also need to add Caucho M2 repository to pull Hessian jar files. The resulting POM should look like this:
<project xmlns="http://maven.apache.org/POM/4.0.0" xmlns:xsi="http://www.w3.org/2001/XMLSchema-instance"
         xsi:schemaLocation="http://maven.apache.org/POM/4.0.0 http://maven.apache.org/maven-v4_0_0.xsd">
    <modelVersion>4.0.0</modelVersion>
    <groupId>org.example.cayenne</groupId>
    <artifactId>tutorial-rop-client</artifactId>
    <version>0.0.1-SNAPSHOT</version>

    <dependencies>
        <dependency>
            <groupId>org.apache.cayenne</groupId>
            <artifactId>cayenne-client</artifactId>
            <!-- Here specify the version of Cayenne you are actually using -->
            <version>3.1M3</version>
        </dependency>
        <dependency>
        <groupId>com.caucho</groupId>
            <artifactId>resin-hessian</artifactId>
            <version>3.1.6</version>
        </dependency>
    </dependencies>

    <repositories>
        <repository>
            <id>caucho</id>
            <name>Caucho Repository</name>
            <url>http://caucho.com/m2</url>
            <layout>default</layout>
            <snapshots>
                <enabled>false</enabled>
            </snapshots>
            <releases>
                <enabled>true</enabled>
            </releases>
        </repository>
    </repositories>
</project>
Your computer must be connected to the internet. Once you save the pom.xml, Eclipse will download the needed jar files and add them to the project build path. After that all the errors should disappear.
Now let's check the entity class pairs. They look almost identical to their server counterparts, although the superclass and the property access code are different. At this point these differences are somewhat academic, so let's go on with the tutorial.