CayenneModeler can be used to generate both database schema and Java classes from the single XML model. Very often the database already exists and is maintained independently (e.g., by a DBA). In this case you won't have to go through the first part of this procedure.
Creating the Database
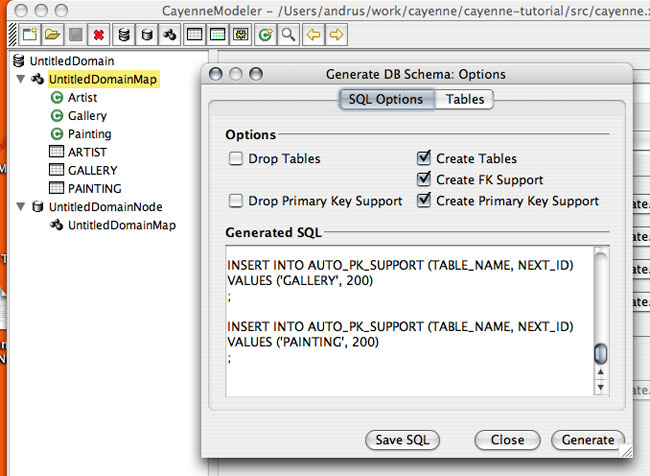
- Click on the DataMap node on the left and then select "Tools > Create Database Schema" from the menu. A connection dialog pops up with fields prefilled with the data you entered for the DataNode.
- Leave it unchanged and click "Continue" - this will open a dialog with a SQL script and several generation options.
- Leave the defaults on ("Create Tables", "Create FK Support", "Create Primary Key Support") and click "Generate" - the database with the tables mapped during previous steps will be created in the specified location. Since Derby uses a filesystem directory for the database, you can actually navigate to it and see that the database is there.
Creating the Java Classes
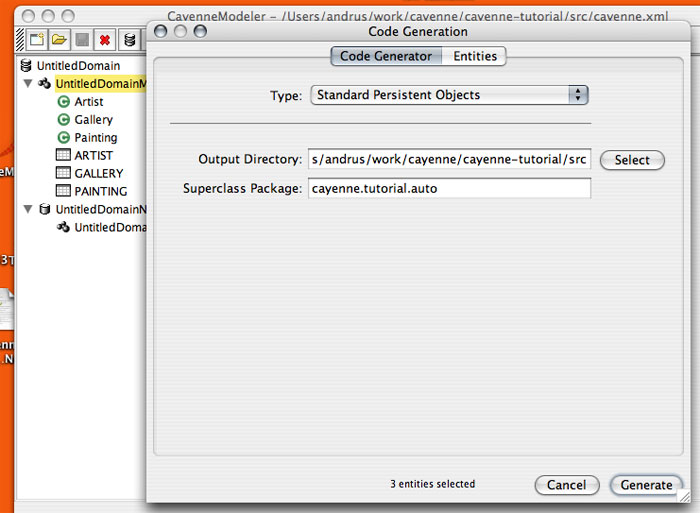
- Now select "Tools > Generate Classes" menu.
- For "Type" select "Standard Persistent Objects" if it is not already selected.
- For the output directory select "cayenne-tutorial/src" directory of your Eclipse project
- Click "Generate"
Note that often you start by generating classes from the Modeler, but at the later stages of the project the generation is usually automated via Ant cgen task. Both methods are interchangeable.
Now go back to Eclipse, right click on "cayenne-tutorial" project and select "Refresh" - you should see a pair of classes generated for each mapped entity. Note that you should not modify the classes whose names start with "_" (underscore), as they will be replaced on subsequent generator runs. Instead all custom logic should be placed in their subclasses located in "cayenne.tutorial" package - those will never be overwritten by the class generator.

Next Step: Tutorial DataContext