
This document will give you information on Axis2 distribution packages, system prerequisites & setting up environment variables and tools followed by detailed instructions on installation methods.
Send your feedback to: axis-dev@ws.apache.org. Prefix subject with [Axis2]. To subscribe to mailing list see here.
Axis2 is distributed in several convenient distribution packages and can be installed either as a standalone server or as part of a J2EE compliant servlet container. Axis2 is distributed under the Apache License, version 2.0. This Installation Guide will mainly focus on running Apache Axis2 using the Standard Binary Distribution.
Download distribution packages of the Apache Axis2 1.1 version (latest).
Download distribution packages of all versions of Apache Axis2.
The Distribution Packages Provided are as follows:
This is the complete version of Axis2 and include samples and convenient scripts as well.
Download Standard Binary Distribution
This will be the Web application of Axis2 which can be deployed in most of the servlet containers.
Download WAR (Web Archive) Distribution
This will contain all the documentation in one package. The package includes the xdocs and the Java API docs of this project.
Download Documents Distribution
This will contain the sources of Axis2 standard distribution, and is mainly for the benefit of the advance users. One can generate a binary distribution using the source by typing $maven dist-bin. You need to set up the Axis2 environment before running this command. Step by step details on how to create the binary distribution is available in the Advanced section.
Download Source Distribution
| Java Development Kit (JDK) | 1.4 or later (For instructions on setting up the JDK in different operating systems, visit http://java.sun.com) |
| Disk | Approximately 11 MB separately for standard binary distribution |
| Operating system | Tested on Windows XP, Linux, Mac OS X, Fedora core, Ubuntu, Gentoo |
| Build Tool-Apache Ant
To run samples and to build war from Axis2 binary distribution. |
Version 1.6.5 or higher(download). |
| Build Tool- Apache
Maven 1.x
Required only for building Axis2 from Source Distribution |
1.0.2 or higher in Maven 1.x series (download). Please download maven 1.x version. Axis2 does not support maven 2. |
Download and install a Java Development Kit (JDK) release (version 1.4 or later) from here . Install the JDK according to the instructions included with the release.Set an environment variable JAVA_HOME to the pathname of the directory into which you installed the JDK release.
Download and unpack the Axis2 Standard Binary Distribution into a convenient location so that the distribution resides in its own directory. Set an environment variables AXIS2_HOME to the pathname of the extracted directory of Axis2 (Eg: /opt/axis2-1.1).
Standalone Axis2 server can be started by executing the following commands:
$AXIS2_HOME\bin\axis2server.bat (Windows)
$AXIS2_HOME/bin/axis2server.sh (Unix)
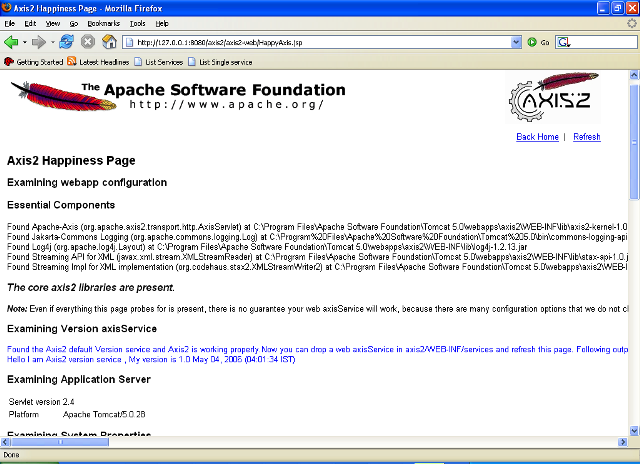
After startup, the default web services included with Axis2 will be available by visiting http://localhost:8080/axis2/services/
Download and install Apache Ant (version 1.6.5 or later) from here . Install the Apache Ant according to the instructions included with the Ant release.
Locate the ant build file (build.xml) inside the webapp directory which resides in your Axis2 home directory (i.e:- $AXIS_HOME/webapp)". Run the Ant build by executing "ant create.war" inside the $AXIS2_HOME/webapps folder. You can find the generated axis2.war inside the $AXIS2_HOME/dist directory. All the services and modules that are present in the AXIS2_HOME/repository will be packed in to the created axis2.war together with the Axis2 configuration found at $AXIS2_HOME/conf/axis2.xml.
You can read the installing Axis2 in a servlet container to figure out how to deploy the Axis2 web application in a servlet container.
It is advised to add the $AXIS2_HOME/bin to the PATH, so that you'll be able to run the following scripts from any where.
| Script Name | Description |
| axis2.{bat|sh} | You can use this script to run web service clients written using Axis2.
This script calls the "java" command after adding the classpath for Axis2 dependent libraries (*.jar files present in your AXIS2_HOME/lib),
setting the Axis2 repository location (AXIS2_HOME/repository) and setting the Axis2 configuration file location(AXIS2_HOME/conf/axis2.xml) for you. With this you can be relieved from setting all the above Axis2 specific parameters. Usage : axis2.{sh.bat} [-options] class [args...] |
| axis2server.{sh|bat} | This script will start an standalone Axis2 server using the AXIS2_HOME/repository as the
Axis2 repository and the AXIS2_HOME/conf/axis2.xml as the Axis2 configuration file. This will start all the transport listeners listed in the AXIS2_HOME/conf/axis2.xml.
As an example, if you want to deploy a service using standalone Axis2 server,then copy your service archive to the AXIS2_HOME/repository/services directory. After that go to the "Transport Ins" section of the AXIS2_HOME/conf/axis2.xml and configure the transport receivers (simpleHttpServer in port 8080 is listed by default). Then invoke this script. |
| wsdl2java.{bat|sh} | This script generates java code according to a given WSDL file to handle Web service invocations
(Client side Stubs). This script also has the ability to generate service skeletons according to the given WSDL. Usage: WSDL2Java.{sh|bat} [OPTION]... -uri <Location of WSDL> Eg: WSDL2Java.sh -uri ../wsdl/Axis2Sample.wsdl A more detailed reference about this script can be found here |
| java2wsdl.{bat|sh} | This script generates the appropriate WSDL file for a given java class. Usage: Java2WSDL.{sh|bat} [OPTION]... -cn <fully qualified class name> Eg: Java2WSDL.sh -cn ../samples/test/searchTool.Search A more detailed reference about this script can be found here |
Which ever the distribution, installing Axis2 in a J2EE compliant servlet container is as follows:
Note: For any Application server specific installation information please refer Application Server Specific Configuration Guide.
The Axis2 Web application also provides an interface to upload services. Once a service is created according to the service specification as described in User's Guide that jar file can be uploaded using the upload page.

The uploaded jar files will be stored in the default service directory. For Axis2 this will be the <webapps>/axis2/WEB-INF/services directory. Once a service is uploaded it will be installed instantly.
Since Axis2 supports hot deployment one can drop the service jar directly through the file system to the above mentioned services directory. It will also cause the service to be automatically installed without the container being restarted.
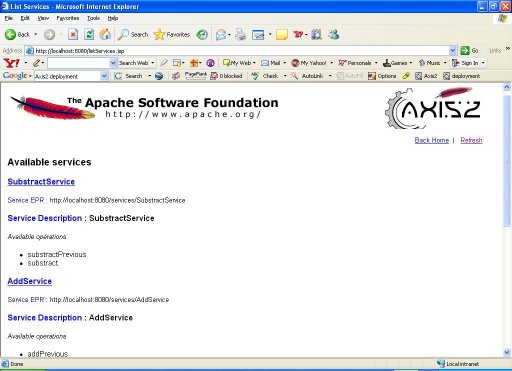
Use the 'Services' link on the Web Application home page to check the successful installation of a service. The services and the operations of successfully installed services will be displayed in the available services page.
If the service has deployment time errors it will list those services as faulty services. If you click on the link you can see the deployment fault error message(s).

Deployment time error message

Axis2 Administration is all about configuring Axis2 at the run time and the configuration will be transient. More descriptions are available in Axis2 Web Administration Guide
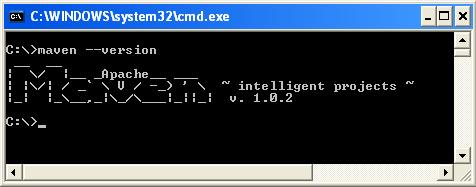
Required jar files do not come with the distribution and they will also have to be built by running the maven command. Before we go any further it is necessary to install Maven
The Axis2 build is based on Maven . Hence the only prerequisite to build Axis2 from source distribution is to have Maven installed. Extensive instruction guides are available at the Maven site. This guide however contains the easiest path for quick environment setting. Advanced users who wish to know more about Maven can visit here .
The tar ball or the zip archive is the best option. Once the archive is downloaded expand it to a directory of choice and set the environment variable MAVEN_HOME and add MAVEN_HOME/bin to the path as well. More instructions for installing Maven in Unix based operating systems can be found here .
Once maven is properly installed you can start building Axis2.
Maven commands that are frequently used in Axis2 are listed on the FAQs page.
The Source Distribution is available as a zipped archive. All the
necessary build scripts are included with the source distribution. Once the
source archive is expanded into a directory of choice, moving to the
particular directory and running maven command will build the
Axis2 jar file.
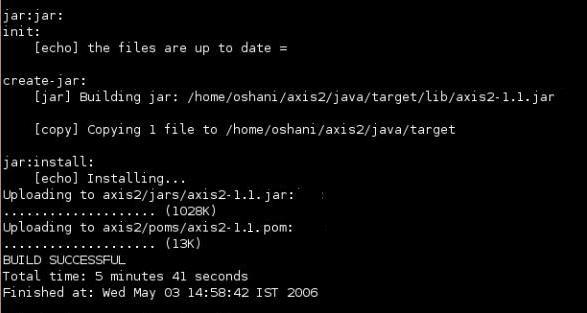
Once the command completes, the binaries (jar files in this case) can be found at a newly created "target" directory.
Note: For the first Maven build (if the maven repository is not built first) it will take a while since required jars need to be downloaded. However this is a once only process and will not affect any successive builds.
The default maven build will however build only the Axis2
jar file. To obtain a WAR (Web Archive), maven
war command should be issued. This will create a complete WAR with the
name axis2.war inside the target directory.
Once this build step is complete, the binaries are ready to be deployed.