OpenOffice.org 1.1
Setup Guide
Public Documentation License Notice
The contents of this Documentation are subject to the Public Documentation License Version 1.0 (the "License"); you may only use this Documentation if you comply with the terms of this License. A copy of the License is available at http://www.openoffice.org/licenses/PDL.html.
The Initial Writer of the Original Documentation is Sun Microsystems, Inc. Copyright (C) 2003. All Rights Reserved. (Initial Writer contact(s): dedr@openoffice.org).
The English language document was edited and added to by Alex Fisher. (contact information: settantta@openoffice.org
Additional graphic images were provided by Kevin B Hendrcks and Kedar.
Contents
1 About This Guide 7
Icons Used in This Guide 7
2 General Installation Information 9
Installation Types 9
System Requirements 10
General System Requirements 10
Special System Requirements for the Solaris™ Operating Environment (SPARC® Platform Edition) – Solaris OE (SPARC) 10
Special System Requirements for Linux 11
Special System Requirements for Windows 11
Contents of the Download Setup Packages 12
Before You Install From a Downloaded Set 12
Updating an Existing Installation 13
Updating a Multi-User Installation 13
3 Single-User Installation 15
Installation Requirements 15
Starting the Installation 16
Installing From a CD on UNIX Platforms 16
Installing From a Download Set on UNIX Platforms 17
Installing From a CD on Windows Platforms (using download earlier than 1.1.3) 17
Installing From a CD on Windows Platforms (using 1.1.3 download and later) 18
Installing From a Download Set on Windows Platforms 18
The Setup Procedure 19
Welcome 19
Important Information 20
License Agreement 22
User Data 23
Type of Installation 23
Component Selection 25
Installation Directory 26
Reviewing the Installation Options 27
Assigning File Types 28
Java™ Runtime Environment Installation 30
Copying the Files 30
Concluding the Installation 31
Starting OpenOffice.org 32
4 Multi-User and Network Installation 33
Server Installation 33
Installation Requirements 33
Starting the Installation 34
The Setup Procedure 35
Workstation Installation 46
Installation Requirements 46
Starting the Installation 46
The Setup Procedure 48
5 Appendix 61
Installing the Java™ Runtime Environment Under Windows 61
Setting up Printer, Fax and Fonts Under UNIX® Based Platforms 61
Setting up Printers 62
Using Fax Functionality 65
Connecting a PostScript to PDF Converter 66
Installing Fonts 67
Installing a patch under the Solaris™ Operating Environment (OE) 70
Modifying an Existing OpenOffice.org Installation 71
Modify 71
Repair 71
Remove 72
Setup Parameters 72
Starting the OpenOffice.org Software With Parameters 73
Starting the OpenOffice.org Software From the Command Line 73
Valid Command Line Parameters 74
Registering OpenOffice.org 75
Extending the OpenOffice.org Software 77
Installing, Updating and Removing Extensions for a Single User 78
Installing, Updating and Removing Extensions for Multiple Users 79
There are some icons used to call your attention to additional helpful information.
|
|
The "Important" icon alerts you to information regarding data and system security. |
|
|
|
|
|
The "Note" icon marks extra information that you may find useful - for example, an alternative way to reach a certain goal. |
|
|
|
|
|
The "Tip" icon indicates information that lets you work with the program easier. |
|
|
|
|
|
The "Solaris" icon marks information that only applies to the Solaris™ Operating Environment (OE). |
|
|
|
|
|
The "Linux" icon marks information that only applies to Linux platforms. |
|
|
|
|
|
The "Unix" icon marks information that applies to all platforms based on the UNIX® platform (Solaris OE and Linux). |
|
|
|
|
|
The "Win" icon marks information that only applies to the Microsoft Windows operating system. |
This chapter provides general installation information and the system requirements for running OpenOffice.org. Information on modifying an existing OpenOffice.org 1.1 installation can be found in the Appendix under "Modifying an Existing OpenOffice.org Installation" on page 71.
|
Installation Type |
Usage |
|
Single-User Installation (Page 15 ) |
Installs the OpenOffice.org software on one computer for one user. |
|
Multi-User
or |
Installs the OpenOffice.org software on a single computer for multiple users or users with restricted access rights, or on a network computer for collective use. Network installation consists of two phases:
|
|
|
If you install OpenOffice.org in Windows as a user with restricted access rights (any user without administrator rights), the software will not install correctly. In this case, perform a Server Installation as an administrator, followed by a Workstation Installation as a user, as described on page . |
CD-ROM drive, (if installing from a CD)
Approximately 300 MB of available hard-disk space is required for the standard installation.
Graphics device capable of 800 x 600 resolution and 256 colors.
Solaris™ 8 Operating Environment (OE) or higher (Solaris 9 OE recommended)
Solaris 8 OE requires patches 108434-10, 108773-17, 109147-21 and 108435-10 (64 bit only)
XServer (capable of 800x600 screen resolution and 256 colors) with a window manager (for example, the OpenWindows™ software, CDE, or GNOME). For accessibility support, GNOME 2.0 or higher is required.
at least 128 MB of RAM
|
|
Patches for the Solaris OE can be found on the CD in the directory /solsparc/patches, or on the internet at http://sunsolve.sun.com. |
PC with Pentium or compatible processor
Linux Kernel 2.2.13 or higher
glibc2 version 2.2.0 or higher
XServer (capable of 800x600 screen resolution and 256 colors) with window manager (for example, GNOME). For accessibility support, GNOME 2.0 or higher is required.
at least 128 MB of RAM
|
|
OpenOffice.org cannot be installed on a (V)FAT partition under Linux since FAT file systems do not support the creation of symbolic links. |
Microsoft Windows 98, ME, NT (Service Pack 6 or higher), 2000 or XP. For support of Asian character input under Windows 98/ME a native Windows 98/ME system is required.
PC with Pentium or compatible processor
64 MB of RAM
Please note that administrator rights are needed for the installation process.
Download setup packages consist of the OpenOffice.org setup application, and the User and Setup (this document) Guides in Portable Document Format (PDF). The contents of the setup packages for the different platforms are listed in the following table:
|
Platform |
Installation Files |
|
Windows |
OpenOffice.org Setup: setup.exe, setup.inf and copies of the licenses.
|
|
Solaris OE (SPARC) |
OpenOffice.org Setup: nstall (a shell script). setup (the setup program), setup.ins (a plain text list of files to be installed) and copies of the licenses
|
|
Linux |
OpenOffice.org Setup: install (a shell script). setup (the setup program), setup.ins (a plain text list of files to be installed) and copies of the licenses
|
Place all the downloaded installation files in the same folder.
|
|
Ensure that the setup files have executable rights. If they do not, use chmod to change the rights. |
You can update an existing OpenOffice.org installation (1.0.2 and higher) to OpenOffice.org 1.1 and continue to use the existing configuration settings. If the setup application finds a earlier OpenOffice.org version on your system, you are prompted to update the installation, or to install the latest version in a different directory. You cannot update an earlier version that is in a different language.
|
|
We do not recommend that you update to a beta version of the OpenOffice.org software. |
The setup application only updates the server installation of a multi-user installation (see also page 33). The next time a user opens OpenOffice.org, a prompt appears offering to update the local user data.
The single-user installation installs the OpenOffice.org 1.1 software on one computer for one user. For a single-user installation, log on to your system as a normal user, and then install OpenOffice.org into your home directory, or in another local directory for which you have full access rights.
|
|
Linux/Unix and Window XP/2000users: It is essential to use the two stage Multi-user installation procedure, even if it is on a stand-alone box, and you are the only user. Linux/Unix users: It is recommended that you use the automated installation script provided. |
|
|
You can stop the installation process at any time by clicking the Cancel button in the installation dialog. You can also choose to remove the installation directory at this point. If you do, all files and subfolders are removed. |
Depending on the options that you choose, the single-user installation requires between 190 and 250 MB of free space on your hard-disk. During the installation, an additional 40 MB is required for temporary files on Windows systems, and 80 MB on UNIX® based platforms.
On systems with a previously installed version of OpenOffice.org, open one of the following files:
.sversionrc (UNIX based systems)
sversion.ini
(Windows based systems).
For
Windows NT/2000 and Win9x
configured for multiple users, the sversion.ini file is in
"C:\Program Files and Settings\{user name}\Application Data".
These files contain the path and version number of the installed OpenOffice.org software. If the version number is identical to the version that you want to install, you must uninstall OpenOffice.org, before you can reinstall it. If the version number is lower than the version that you want to install, and greater than 1.0.2, you can choose to update the installation (see Updating an Existing Installation on page 13)
Log on with your user name (system administrator rights are not required for a single-user installation).
Start the graphical X Window interface.
Change to the installation directory on the CD. On a multiple-platform installation CD, the installation files are found in:
Solaris/Sparc for the Solaris™ Operating Environment (SPARC® Platform Edition) – Solaris OE (SPARC)
Solaris/Intel for the Solaris™ Operating Environment (x86 Platform Edition) – Solaris OE (x86)
Linux for Linux
Start the setup application with the command:
./setup
Log on with your user name (system administrator rights are not required for a single-user installation).
Start the graphical X Window interface.
Change to the directory containing the downloaded installation file.
Unpack the tarball into a suitable
temporary location, either by using a graphical front-end to tar, or
by opening a terminal and executing the command
tar
-xzf Ooo_1.1.0_LinuxIntel_install.tar.gz
(This will
create a new directory named Ooo_1.1.0_LinuxIntel_install)
Open a console window in an X-session.
|
|
Note: The setup progam must be run from within an X-session. It cannot be run from the command line. |
Execute the following
commands:
cd
/<temp_dir>/Ooo_1.1rc3_LinuxIntel_install
./setup
If required, log on with your user name (system administrator rights are not required for a single-user installation).
Change to the setup directory on the installation CD.
On a multiple-platform CD, the setup files are found in the Windows folder.
Do one of the following:
Double-click setup.exe
Open the Windows Start
menu, choose Run, and then type
X:\Windows\setup.exe in the
Open box where X
is the letter of your CD-ROM drive.
Click OK to start the installation.
The 1.1.3 Downloads are now EXE files, which means that you no longer have to unzip before running the Install.
To run the install, just double click on the EXE file.
If required, log on with your user name (system administrator rights are not required for a single-user installation).
Change to the directory containing the downloaded installation file.
Open the Zip file with a suitable program such as WinZip, and extract the files to a suitable temporary location (C:\Temp is suitable). This will create a new directory named C:\<temporary_directory>\OOo_1.1.0_Win32Intel_install
Change to the directory containing the un-packed downloaded installation files.
Do one of the following:
Double-click setup.exe.
Open the Windows Start
menu, choose Run, and then type
X:\instdir\
in the Open box where X:\instdir
is the directory with the download set files.set.exeup
Click OK to start the installation.
During the installation, click the Help button to display information about the current dialog, and then click the Back button to return to the setup program. Do NOT close the Help window with the "X" button on the top right corner of the window, as this would exit the setup program.
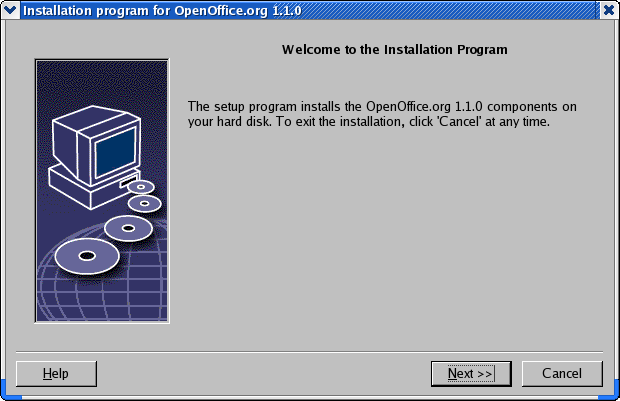
The first window to appear after you start the setup application is the welcome dialog.
|
|
Click Next.
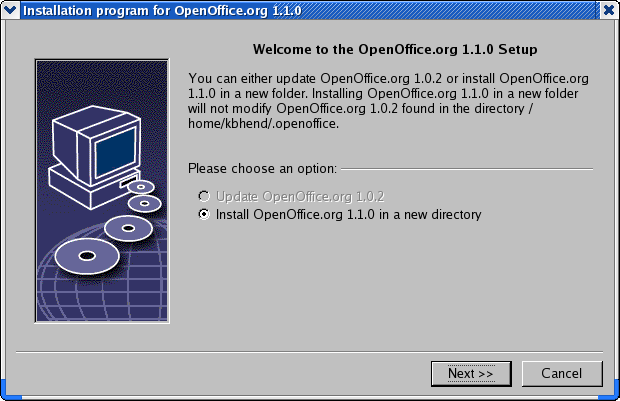
If the setup application finds a previous version of OpenOffice.org (1.0.2 or higher), you are prompted to update the installation, or to install into a new directory.
|
|
Choose an install option, and then click Next.
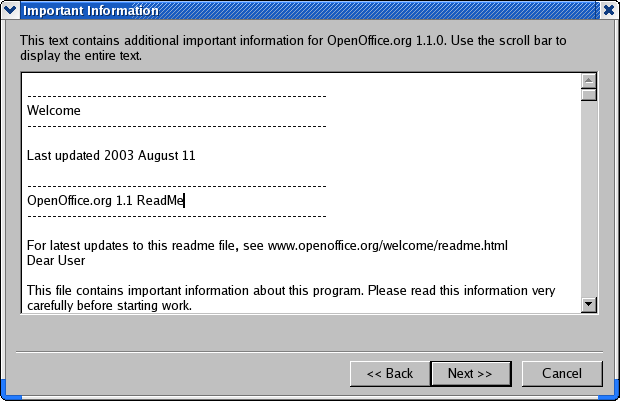
The readme file is displayed in a window. The readme file is located in the installation directory on your machine, so that you can open it later.
|
|
Read the information, and then click Next.
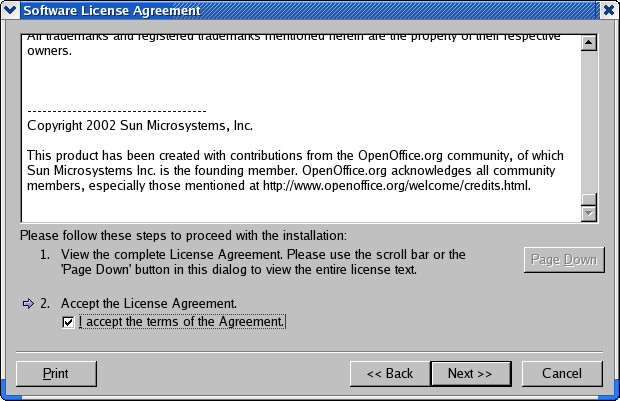
The next dialog contains the license agreement. If you do not accept the agreement the OpenOffice.org software will not be installed.
|
|
Read through the license agreement. If you agree, ensure that you have scrolled to the bottom of the agreement, select the I accept the terms of the agreement box, and then click OK.
If you do not agree, click Decline to exit the setup program.
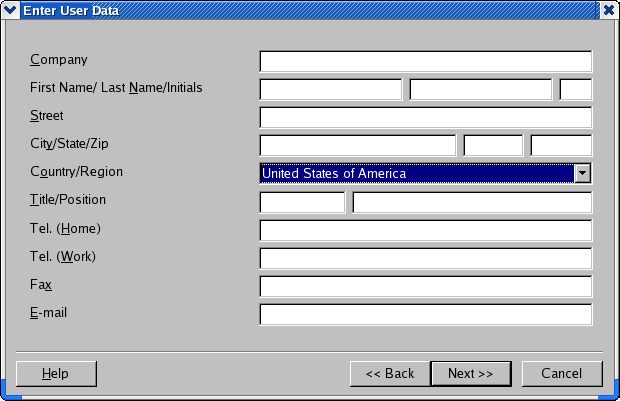
Next, the Enter User Data dialog appears.
The data entered here is used by OpenOffice.org to personalize templates and documents.
You can access this dialog later from any OpenOffice.org application, choose Tools - Options - OpenOffice.org - User Data.
|
|
Enter your personal data.
Click Next to continue with the installation.
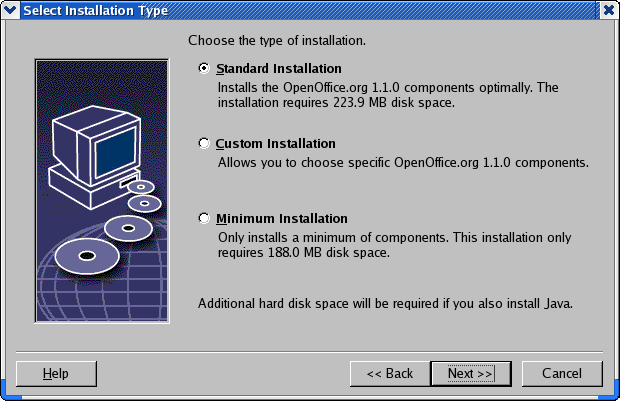
Use this dialog to select the type of installation that you want to perform. This dialog does not appear if you are updating a previous version of OpenOffice.org.
The space requirements that are listed are only estimates and depend on the properties of the storage media.
There are three types of installation available:
Standard Installation - recommended for most users. Installs all of the OpenOffice.org applications, and a selection of filters.
Custom Installation - recommended for advanced users. Allows you to select the individual components to be installed.
Minimum installation - recommended for users with space restrictions. This option only installs the components that are required to run OpenOffice.org.
|
|
Select the type of installation that you want to perform.
Click Next to continue the installation.
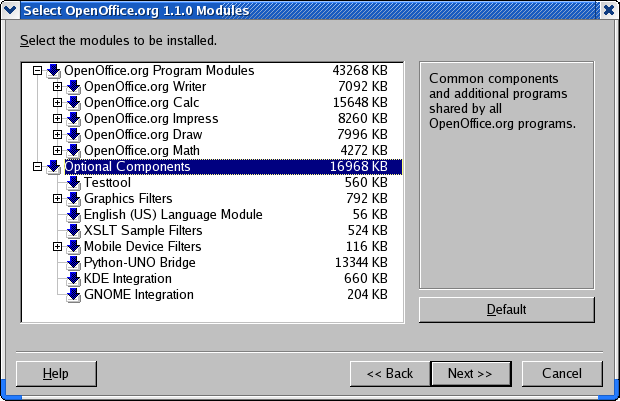
If you select the Custom Installation option, you can then choose the modules and the components that you want to install.
Click the plus sign (+) next to the name of a module or component category to expand the list. Click the category or the component that you want to install. If a category contains unselected components, the box in front of the category is semi-transparent.
|
|
Categories in dark blue are installed with all of their components. |
|
|
Categories in light blue are installed with only some of their components. |
|
|
Categories in white are not installed. |
To restore the standard installation options, click the Default button.
|
|
Select the modules and the components you want to include in the installation.
Click Next to continue the installation.
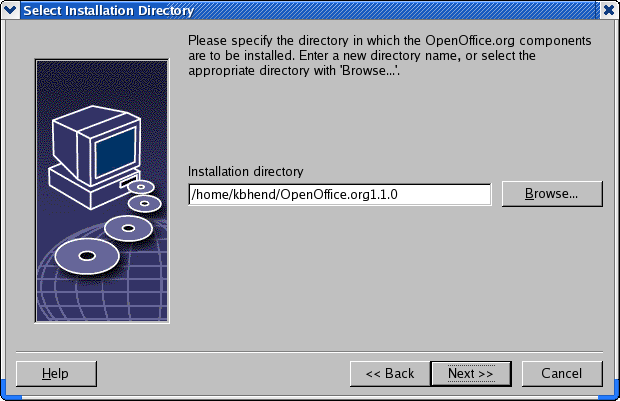
The next dialog lets you select the installation directory. This dialog does not appear in an update installation.
The available drives on your system are listed in this dialog. The space requirements displayed are only estimates and depend on the properties of the storage media.
|
|
Note: There are slight differences between the Windows dialog and the unix/linux dialog. |
|
|
Enter a path for the Installation directory in the text box, or click Browse to select a directory.
If the directory does not exist, you are prompted to create it.
Click Next to continue with the installation.
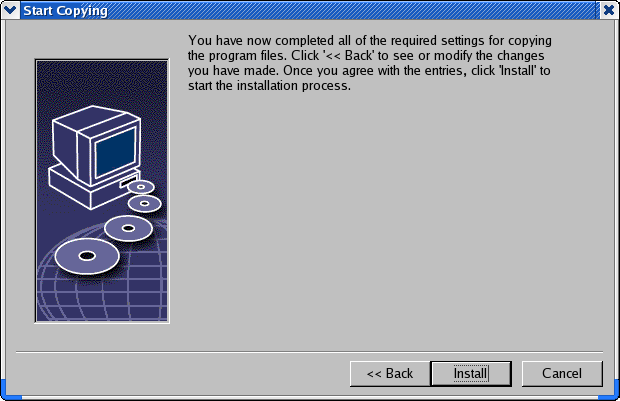
After you set your installation options, a dialog appears that allows you review the settings.
|
|
Click Install to continue with the installation, or click Back to alter the settings made.
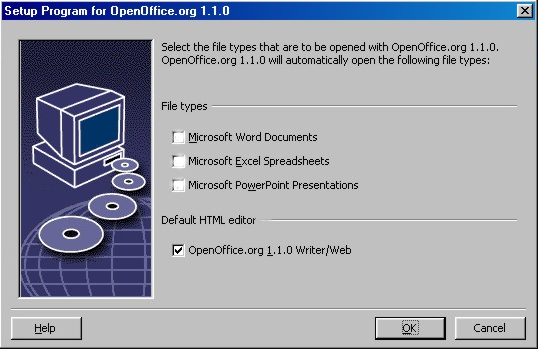
Use this dialog to associate OpenOffice.org with Microsoft file types, and with HTML documents. This information is registered in your operating system.
|
|
Select the File types that you want OpenOffice.org to open.
|
|
Unless you intend to use OpenOffice.org as your regular daily Office suite, make sure you leave the boxes unchecked. (If you forget, or miss this screen, don"t panic, as your files are still there, and are still in the original format. They may still be opened from within Word or Excel by using the "Open File..." button. They can also be re-associated with Microsoft Office, by right-clicking on a file (Shift-right-click in Windows 9x/Me) and selecting "Open With...", then choosing the Microsoft program and checking the "Always open with this program" box.). Whether you check these boxes or not, you may still open all your Microsoft Office files with OpenOffice.org. |
To make OpenOffice.org Writer the default editor for HTML files, select the check box in the Default HTML Editor check box.
Click OK.
|
|
You can set the file type assignments of an existing installation by running the setup application and selecting the Modify option (see Modify on page 71). |
The next dialog lists the versions of the Java™ Runtime Environment (JRE) registered in your system, or gives you the option to install the JRE.
Select the JRE that you want to use. Version 1.4 or higher is recommended. If you already have a JRE installed, you do not have to install the version provided.
|
|
If a JRE is present on your system, select the version that you want to use, and then click OK.
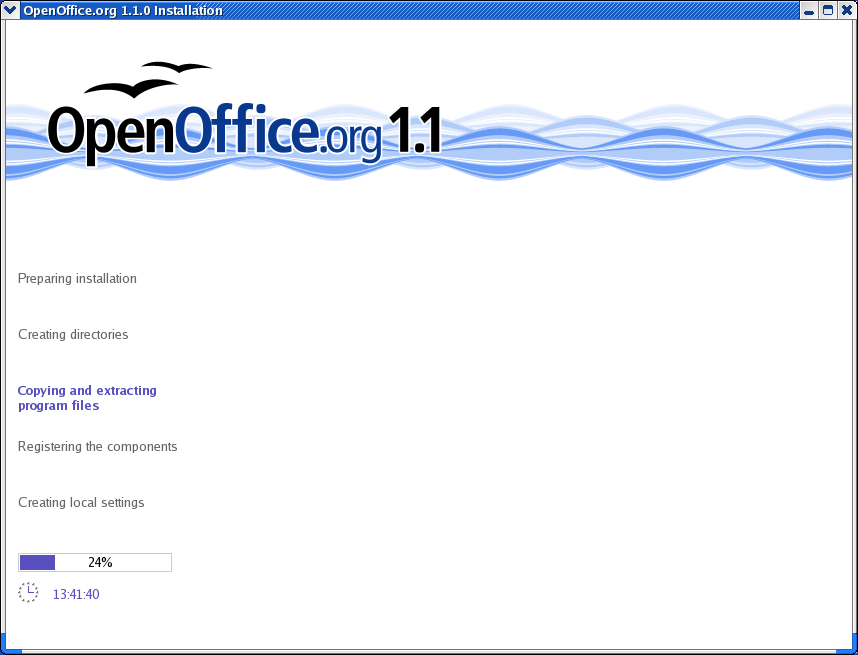
During the installation, the progress is indicated as a percentage and the remaining time is estimated.
|
|
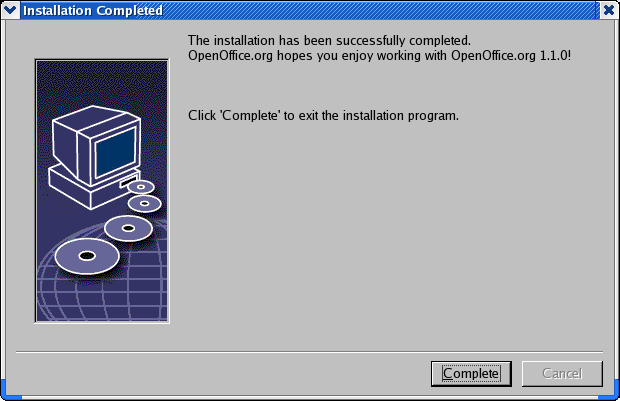
When the installation is complete, a final dialog is displayed.
|
|
Click Complete to finish the installation.
|
|
Depending on the window manager that you use, you may need to log off and restart your window manager. |
|
|
Change to the {installpath}/program directory, or to the local OpenOffice.org directory in your home directory, and type:
You can also add the {installpath}/program directory to the program path, and then type "soffice" in any directory to start OpenOffice.org. To set up the default printer for OpenOffice.org, call the spadmin Printer Administration Utility, as is described in the Appendix. After completing the installation process under the Solaris OE, log out and log in again to update the CDE integration. |
|
|
The icons for starting the OpenOffice.org applications are added to the Windows Start menu in the programs/OpenOffice.org 1.1 folder. During the installation process, a link to the OpenOffice.org Quickstarter is added to the Autostart folder in the Windows Start menu. The Quickstarter is added to the system tray when you start Windows. Right-click the Quickstarter icon in the system tray, and choose the OpenOffice.org application that you want to start. For more information on the Quickstarter, see the online help. |
Information about starting OpenOffice.org with command line parameters is found in the Appendix.
Installing OpenOffice.org for multiple users on a network is a two-step process:
Server Installation - installed by the system administrator using the setup -net command. The OpenOffice.org files are copied to a directory with read and execute permission for all users (see page 33)
User Installation - each user installs a copy of OpenOffice.org in their home directory, or only installs user-specific files. The latter is also known as a Workstation Installation, and requires access to the Server Installation to run the OpenOffice.org applications (see page 46).
The Server Installation is not a stand-alone version of the OpenOffice.org software. Before you can use OpenOffice.org, you must perform a Workstation Installation from the Server Installation (see "Workstation Installation" on page 46).
The Server Installation of the OpenOffice.org software requires approximately 250 MB of disk space. Temporary setup files generated during the install process require an additional 20 MB of disk space. These temporary files are automatically removed after the installation. Under UNIX®, an 80 MB temporary swap volume is created during the installation and deleted afterwards.
Log on as the system administrator.
Start the graphical XWindow interface.
Change to the installation directory on the CD. On a multiple-platform installation CD, the installation files are found in:
Solaris/Sparc for the Solaris™ Operating Environment (SPARC® Platform Edition) – Solaris OE (SPARC)
Solaris/Linux for the Solaris™ Operating Environment (x86 Platform Edition) – Solaris OE (x86)
Linux (for Linux)
Start the installation script with
the command:
./setup -net
|
|
Note: For Linux there is an automated installation script named install. This may be used instead of the 'setup -net' command if a custom installation is not required. |
Log on as the system administrator.
Start the graphical XWindow interface.
Change to the directory containing the downloaded installation files.
Start the setup application with
the command:
./setup -net
|
|
Note: For Linux there is an automated installation script named install. This may be used instead of the 'setup -net' command if a custom installation is not required. |
Log in as the system administrator.
Open the Windows Start
menu, choose Run, and then type
X:\W in the Open box.
indows\setup.exe
-net
X is the letter of your CD ROM drive.
Click OK to start the installation.
Log in as the system administrator.
Open the Windows Start
menu, choose Run, and then type
X:\instdir\setup.exe -net in
the Open box.
X:\instdir is the directory with the download set files.
Click OK to start the installation.
|
|
When updating an existing OpenOffice.org installation, you may have to tell the setup program where this previous version is installed. If the setup procedure does not automatically recognize a previous version that can be updated, try running the setup application with the -update parameter:
where <setup> is the name of the setup routine to be started (see above), and <path_to_previous_serverinst> is the fully qualified path to the previous server installation of OpenOffice.org. |
The first window to appear after you start the setup application is the welcome dialog.
|
|
Click Next.
If the setup application finds a previous version of OpenOffice.org (1.0.2 or higher), you are prompted to update the installation, or to install into a new directory.
|
|
Choose an install option, and then click Next.
The readme file is displayed in a window. The readme file is located in the installation directory on your machine, so that you can open it later.
|
|
Read the information, and then click Next.
The next dialog contains the license agreement. If you do not accept the agreement the OpenOffice.org software will not be installed.
|
|
Read through the license agreement. If you agree, ensure that you have scrolled to the bottom of the agreement, select the I accept the terms of the agreement box, and then click OK.
If you do not agree, click Decline to exit the setup program.
Use this dialog to select the type of installation that you want to perform. This dialog does not appear if you are updating a previous version of OpenOffice.org.
The space requirements that are listed are only estimates and depend on the properties of the storage media.
There are three types of installation available:
Standard Installation - recommended for most users. Installs all of the OpenOffice.org applications, and a selection of filters.
Custom Installation - recommended for advanced users. Allows you to select the individual components to be installed.
Minimum installation - recommended for users with space restrictions. This option only installs the components that are required to run OpenOffice.org.
|
|
Select Custom Installation.
Install all of the OpenOffice.org components during the server installation, so that each user can access these options during a Workstation Installation.
Click Next to continue the installation.
If you select the Custom Installation option, you can then choose the modules and the components that you want to install.
Click the plus sign (+) next to the
name of a module or component category to expand the list. Click the
category or the component that you want to install. If a category
contains unselected components, the box in front of the category is
semi-transparent.
|
|
Categories in dark blue are installed with all of their components. |
|
|
Categories in light blue are installed with only some of their components. |
|
|
Categories in white are not installed. |
To restore the standard installation options, click the Default button.
|
|
Select the modules and the components you want to include in the installation.
Click Next to continue the installation.
The next dialog lets you select the installation directory. This dialog does not appear in an update installation.
The available drives on your system are listed in this dialog. The space requirements displayed are only estimates and depend on the properties of the storage media.
|
|
Enter a path for the Installation directory in the text box, or click Browse to select a directory.
If the directory does not exist, you are prompted to create it.
Click Next to continue with the installation.
|
|
Ensure that the directory that you select for the server installation, has read and execution rights for all users, so that you can perform Workstation Installations. |
The next dialog lists the versions of the Java™ Runtime Environment (JRE) registered in your system, or gives you the option to install the JRE.
Select the JRE that you want to use. Version 1.4 or higher is recommended. If you already have a JRE installed, you do not have to install the version provided.
|
|
If a JRE is present on your system, select the version that you want to use, and then click OK.
|
|
The JRE installation is a shared installation for all users. If you do not install the JRE at this point, users can install it when they perform a workstation installation. |
After you set your installation options, a dialog appears that allows you review the settings.
|
|
Click Install to continue with the installation, or click Back to alter the settings made.
During the installation, the progress is indicated as a percentage and the remaining time is estimated.
|
|
When the installation is complete, a final dialog is displayed.
|
|
Click Complete to finish the installation.
|
|
Depending on the window manager that you use, you may need to log off and restart your window manager. |
Now, each user can perform a Workstation Installation, to copy the necessary files to his or her home directory or local hard disk. The Workstation Installation is described in the next chapter.
If you intend to perform a large number of installations from a Server Installation, you may want to turn off the registration dialog that appears the second time a user starts OpenOffice.org. For details, see 75 in the Appendix.
Before you can run OpenOffice.org on a network installation, you must perform a Workstation Installation. Each Workstation Installation requires access to the main OpenOffice.org components on the central server installation.
|
|
When you update an existing Server Installation, users are automatically prompted to update the Workstation Installations the next time they are started. |
A workstation installation requires a minimum of 20 MB free space.
Before you can install OpenOffice.org on a workstation, you must perform a Server Installation. See Server Installation on page 33 for details.
On systems with a previously installed version of OpenOffice.org, open one of the following files:
.sversionrc (UNIX based systems)
sversion.ini (Windows based systems).
For Windows NT/2000 and Win9x configured for multiple users, the sversion.ini file is in "C:\Program Files and Settings\{user name}\Application Data".
These files contain the path and version number of the installed OpenOffice.org software. If the version number is identical to the version that you want to install, you must uninstall OpenOffice.org, before you can reinstall it. If the version number is lower than the version that you want to install, and greater than 1.0.2, you can choose to update the installation (see Updating an Existing Installation on page 13)
Log on with your user name.
Start the graphical XWindow interface.
Change to the program subdirectory in the setup directory on the server installation. Do not use the original setup file of the OpenOffice.org installation.
Start the installation script with the command:
./setup
|
|
An alternative method for Linux users is to open a graphical file manager such as Konqueror (KDE) or Nautilus (Gnome) and (double-) click on the setup file. You may also press <Alt-F2> and type the command '<server_install_directory>/setup and click 'Run'. |
Log on with your user name.
Change to the program subdirectory in the setup directory on the server installation. Do not use the original setup file of the OpenOffice.org installation.
Do one of the following
Double-click setup.exe.
Open the Windows Start menu, choose Run, and then type {server install dir}\program\setup.exe in the Open box.
where {server install dir} is the setup directory on the server installation.
Click OK to start the workstation installation.
The first window to appear after you start the setup application is the welcome dialog.
|
|
Click Next.
|
|
If the setup application finds a previous version of OpenOffice.org (1.0.2 or higher), you are prompted to update the installation, or to install into a new directory.
Choose an install option, and then click Next.
The readme file is displayed in a window. The readme file is located in the installation directory on your machine, so that you can open it later.
|
|
Read the information, and then click Next.
The next dialog contains the license agreement. If you do not accept the agreement the OpenOffice.org software will not be installed.
|
|
Read through the license agreement. If you agree, ensure that you have scrolled to the bottom of the agreement, select the I accept the terms of the agreement box, and then click OK.
If you do not agree, click Decline to exit the setup program.
Next, the Enter User Data dialog appears.
The data entered here is used by OpenOffice.org to personalize templates and documents.
You can access this dialog later from any OpenOffice.org application, choose Tools - Options - OpenOffice.org - User Data.
|
|
Enter your personal data.
Click Next to continue with the installation.
|
|
If you do not see the dialog window described below, but rather a dialog window offering standard, custom and minimum installation types, close the dialog, and then run the setup application in the program subdirectory on the server installation. |
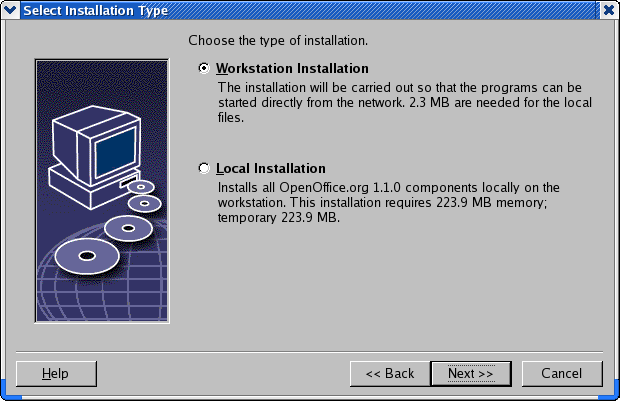
The Workstation Installation option only installs user-specific files locally, and requires access to the server installation to run OpenOffice.org.
The Local Installation option installs a complete copy of OpenOffice.org locally. The resulting installation does not require access to the Server Installation to run OpenOffice.org.
|
|
Select Workstation Installation as the installation type. You have to perform a separate workstation installation for each user on the same machine.
Click Next to continue the installation.
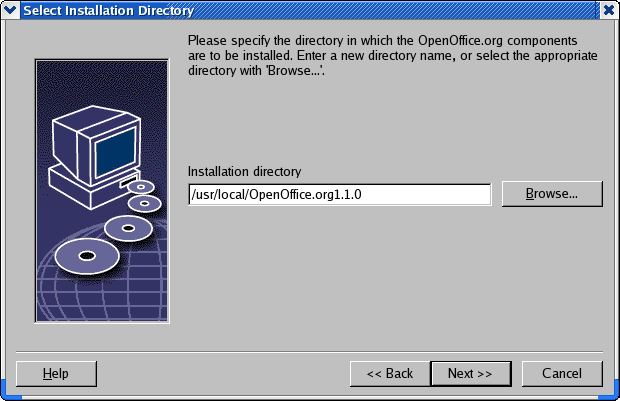
The next dialog lets you select the installation directory. This dialog does not appear in an update installation.
The available drives on your system are listed in this dialog. The space requirements displayed are only estimates and depend on the properties of the storage media.
|
|
Note: The Windows dialog may appear slightly differently |
|
|
Enter a path for the Installation directory in the text box, or click Browse to select a directory.
If the directory does not exist, you are prompted to create it.
Click Next to continue with the installation.
After you set your installation options, a dialog appears that allows you review the settings.
|
|
Click Install to continue with the installation, or click Back to alter the settings made.
Use this dialog to associate OpenOffice.org with Microsoft file types, and with HTML documents. This information is registered in your operating system.
|
|
Select the File types that you want OpenOffice.org to open.
|
|
Unless you intend to use OpenOffice.org as your regular daily Office suite, make sure you leave the boxes unchecked. (If you forget, or miss this screen, don"t panic, as your files are still there, and are still in the original format. They may still be opened from within Word or Excel by using the "Open File..." button. They can also be re-associated with Microsoft Office, by right-clicking on a file (Shift-right-click in Windows 9x/Me) and selecting "Open With...", then choosing the Microsoft program and checking the "Always open with this program" box.). Whether you check these boxes or not, you may still open all your Microsoft Office files with OpenOffice.org. |
To make OpenOffice.org Writer the default editor for HTML files, select the check box in the Default HTML Editor check box.
Click OK.
|
|
You can set the file type assignments of an existing installation by running the setup application and selecting the Modify option (see Modify on page 71). |
If the Java™ Runtime Environment (JRE) was not installed during the Server Installation, you are prompted to install the JRE. To install the JRE, follow the instructions on page 30.
During the installation, the progress is indicated as a percentage and the remaining time is estimated.
|
|
When the installation is complete, a final dialog is displayed.
|
|
Click Complete to finish the installation.
|
|
Depending on the window manager that you use, you may need to log off and restart your window manager. |
|
|
Change to the {installpath}/program directory, or to the local OpenOffice.org directory in your home directory, and type:
You can also add the {installpath}/program directory to the program path, and then type "soffice" in any directory to start OpenOffice.org. To set up the default printer for OpenOffice.org, call the spadmin Printer Administration Utility, as is described in the Appendix. After completing the installation process under the Solaris OE, log out and log in again to update the CDE integration. |
|
|
The icons for starting the OpenOffice.org applications are added to the Windows Start menu in the programs/OpenOffice.org 1.1 folder. During the installation process, a link to the OpenOffice.org Quickstarter is added to the Autostart folder in the Windows Start menu. The Quickstarter is added to the system tray when you start Windows. Right-click the Quickstarter icon in the system tray, and choose the OpenOffice.org application that you want to start. For more information on the Quickstarter, see the online help. |
Information about starting OpenOffice.org with command line parameters is found in the Appendix.
The Appendix contains instructions for installing the Java™ Runtime Environment (JRE),and information about the printer administration program under the Solaris™ Operating Environment and under Linux. It also contains information about modifying, repairing, and deinstalling the OpenOffice.org software.
During the OpenOffice.org installation, you are prompted to install the Java Runtime Environment (JRE). These files are only required to run JAVA based applets and some OpenOffice.org components, such as the Report AutoPilot.
To install the JRE later, run the jvmsetup located in the program directory of the OpenOffice.org installation.
|
|
To use the Java Runtime Environment (JRE) under Linux, refer to the readme file for the most up-to-date information. |
Under UNIX® based platforms, the printer administration program spadmin is provided to help you set up printers, faxes and fonts for use with the OpenOffice.org software.
Call the printer administration program spadmin as follows:
Go to the {installpath}/program directory.
Enter: ./spadmin
After it starts, the window of the printer administration program spadmin appears.
Following a Server Installation, the system administrator first logs on as user root and starts the printer administration program spadmin. The administrator then creates a general printer configuration file called {installpath}/share/psprint/psprint.conf for all users. All changes are immediately available to all users.
The system administrator can also add fonts for all users in the network installation. However, these fonts are available only after restarting the OpenOffice.org software.
Under UNIX based platforms, the OpenOffice.org software only offers direct support for printers using the PostScript™ technology. Other printers must be set up as described in the section Printer Drivers in the OpenOffice.org Software. The OpenOffice.org software automatically provides a printer with the default driver for each system queue. You can add additional printers as needed.
Click the New Printer button.
Select the Create Printer option and click Next.
Select the appropriate driver for your printer. If you are not using a PostScript printer or your model is not listed, use the Generic Printer driver or follow the steps below. You can also add new drivers using the Import button or delete unnecessary drivers using the Delete button. Click Next.
Choose a command line that you can use to print on your printer (for example, lp -d my_queue). Click Next.
Give the printer a name and determine whether it should become the default printer. Click Finish.
To print a test page, click on Test Page. If the test page fails to print or is incorrectly printed, check all settings as described in Changing Printer Settings.
When installing a non-PostScript printer, you must set your system so that PostScript can be converted into the language of the printer. We recommend using current PostScript conversion software such as Ghostscript (http://www.cs.wisc.edu/~ghost/).
You should set up the Generic Printer in that case. Also make sure that the page margins are set correctly.
If you are using a printer using the PostScript™ technology, you should install a description file for the printer (PostScript Printer Definition - PPD) so that you can utilize the specific printer features like paper tray selection, duplex print function and all built-in fonts. You can also use the generic printer driver since it contains the most important data and is suitable for most printers. In that case, you will have to do without the paper tray selection and must correctly set the page margins.
Some PPD files are installed as default files. If there is no matching PPD file for your printer, you will find various PPD files at http://www.adobe.com/products/printerdrivers/. You can also ask the manufacturer of your printer for PPD files.
Click Import in the driver selection dialog.
Click Browse to select the directory where you unpacked the PPD files.
In the Selection of drivers list box, select the printer driver you want to install.
Click OK.
Select the printer driver.
Click Delete.
Be sure that you do not delete the generic printer driver, and remember that drivers deleted from Server Installations are no longer available to other users who are using the same Server Installation.
If the printer has more fonts built in than the usual PostScript fonts, you must also load the AFM files for these additional fonts. Copy the AFM files into the {installpath}/share/psprint/fontmetric directory or into the {installpath}/user/psprint/fontmetric directory. You can find AFM files, for example, at ftp://ftp.adobe.com/pub/adobe/type/win/all/afmfiles/.
In the printer administration program spadmin, select the printer from the Installed printers list box and click Properties. The Properties dialog appears containing several tab pages. This is where you can make settings that are used according to the PPD file of the selected printer.
Select the command on the Command tab page. You can remove superfluous commands using the Remove button.
|
|
Linux users using the CUPS printing system with the KDE desktop should set the print command to kprinter -stdin. Gnome desktop users should use the Gnome equivalent. |
On the Paper tab page, you can define the paper format and paper tray to be used as the default settings for this printer.
On the Device tab page, you can activate the special options for your printer. If your printer can only print in black and white, choose "grayscale" under Color, otherwise choose "color". If switching to grayscale leads to unfavorable results, you can also select "color" under Color and see how the printer or PostScript emulator applies it. Furthermore, on this tab page you can set the precision with which colors are described as well as the PostScript level.
The Font Replacement tab page allows you to select a printer font type available in the printer for each font type installed on your computer. This way you can reduce the data volume sent to the printer. Font replacement can be turned on or off for each printer individually.
You should also set the page margins correctly on the Additional settings tab when using the generic printer driver so that your printout is not cropped. You can also enter a description in the Comments field, which will also be displayed on the Print dialog.
Some of these settings can also be set for the current printout in the Print dialog or the Printer Settings dialog in the OpenOffice.org software with the Properties button.
Select a printer from the Installed printers list box.
To rename the selected printer, click Rename. Enter an appropriate name in the dialog that appears and click OK. The name must be unique and should be chosen so that you can recognize the printer and the application. Printer names must be assigned the same for all users because, when documents are exchanged, the selected printer remains unchanged if the recipient has it under the same name.
To delete the selected printer, click Remove. The default printer or a printer that has been created by the system administrator in a Server Installation cannot be removed using this dialog.
To make the printer selected from the Installed printers list box the default printer, double-click its name or click the Default button.
If you have installed a fax package such as Efax or HylaFax on your computer, you can send faxes with the OpenOffice.org software.
Click New Printer. This opens the Add Printer dialog.
Select Connect a fax device. Click Next.
Choose whether to use the default driver or another printer driver. If you are not using the default driver, select the appropriate driver. Click Next.
Enter a command line with which to communicate with the fax in the following dialog. In the command line of each fax sent "(TMP)" is replaced by a temporary file and "(PHONE)" by the telephone number of the recipient fax machine. If "(TMP)" occurs in the command line, the PostScript code is transmitted in a file, otherwise as standard input through a pipe. Click Next.
Assign a name to your new fax printer and determine whether the telephone numbers (see below) marked in the text should be removed from the printout, or not. Click Finish.
You can now send faxes by printing to the printer that has just been created.
Enter the fax number as text in the document. You can also enter a field that takes the fax number from your active database. In any case, the fax number must start with the characters @@# and end with @@. A valid entry would have the form @@#1234567@@.
If these characters including the telephone number are not printed, activate the Fax number is removed from the printout option under Properties on the Command tab page. If no telephone number is entered in the document, a dialog prompting you for it will appear after the printout.
In OpenOffice.org you can also activate a button for sending faxes to a default fax. To do this, right-click the function bar, open the Visible Buttons submenu and click the Send Default Fax button. You can set which fax is used when this button is pressed under Tools - Options - Text Document - Print.
Remember to create one separate print job for each fax, otherwise, the first recipient will receive all the faxes. In the Tools - Mail Merge dialog select the Printer option and then select the Single print jobs check box.
If a PostScript to PDF converter such as Ghostscript or Adobe Acrobat Distiller is installed on your computer, you can quickly create PDF documents in the OpenOffice.org software.
Click New Printer. This opens the Add Printer dialog.
Select Connect a PDF converter. Click Next.
Choose whether to use the default driver, the Acrobat Distiller driver or another driver. The driver "Generic Printer (T42 enabled)" prefers the type 42 fonts over type 3 fonts; this driver is a good choice for output to a software PostScript interpreter. Click Next.
In the next dialog, enter a command line for the PostScript->PDF Converter. Enter the directory where the PDF files should be saved. If you do not provide a directory, the user's home directory will be used. In the command line "(TMP)" is replaced by a temporary file and "(OUTFILE)" by the target file, the name of which is created from the document name. If "(TMP)" occurs in the command line, the Postscript code is forwarded in a file, otherwise as standard input through a pipe. If Ghostscript or Adobe Acrobat Distiller is in the search path, you can use one of the predefined command lines. Click Next.
Assign a name to your new PDF converter. Click Finish.
You can now create PDF documents by printing to the converter that has just been created.
When you are working with the OpenOffice.org software you might notice that a different number of fonts is provided depending on the document type being used. This is because not all of the fonts can be used in every case.
Therefore, only those fonts will be shown in the font selection box when working with a text document which can also be printed, as it is assumed that you will only want to use those fonts that you can actually have printed on paper.
In an HTML document or in online layout, only fonts that are available on screen are offered.
On the other hand, when working with spreadsheets and drawings you will be able to use all of the fonts that can be either printed or shown on the screen.
The OpenOffice.org software tries to match the display on screen to the printout (WYSIWYG = what you see is what you get). Possible problems are shown in the bottom of the dialog Format - Character.
You can integrate additional fonts in the OpenOffice.org software. Fonts which you integrate are available exclusively to the OpenOffice.org software and can be used with various Xservers without your having to install them there. To make the fonts available to other programs as well, proceed as usual by adding the fonts to your Xserver. The OpenOffice.org software can display and print out PostScript Type1 fonts as well as TrueType fonts (including TrueType Collections).
To integrate additional fonts in the OpenOffice.org software, proceed as follows:
Start spadmin.
Click Fonts.
The dialog lists all fonts added for the OpenOffice.org software. You can select and remove fonts using the Remove button or add new fonts with the Add button.
Click Add. The Add Fonts dialog appears.
Enter the directory from which you want to add the fonts. Press the ... button and select the directory from the path selection dialog or enter the directory directly.
A list of the fonts from this directory appears. Select the fonts you want to add. To add all the fonts, click Select All.
With the Create soft links only check box you can determine whether the fonts are to be copied into the OpenOffice.org directory or only symbolic links are to be created there. If the fonts to be added are on a data medium that is not always available (such as a CD-ROM), you must copy the fonts.
Click OK. The fonts will now be added.
In the case of a Server Installation, the fonts are installed in that installation if possible. If the user has no write access rights, the fonts will be installed in the corresponding Workstation Installation so that only the user who installed them can access them.
To delete fonts, proceed as follows:
Start spadmin.
Click Fonts.
All fonts added to the OpenOffice.org software are listed in the dialog that now appears. Select the fonts you want to delete and click Delete.
You can delete only the fonts that have been added for the OpenOffice.org software.
You can also rename fonts added for the OpenOffice.org software. This is especially useful for fonts that contain several localized names.
Start spadmin.
Click Fonts.
Select the fonts you want to rename and click Rename.
Enter a new name in the dialog that appears. If the font contains several names, these names will serve as suggestions in the combo box where you enter the new name.
Click OK.
If you select several fonts to rename, one dialog appears for each selected font.
If you have selected a TrueType Collection (TTC), one dialog appears for each of the fonts contained in it.
Before you can install OpenOffice.org under the Solaris OE, the system patches described in the chapter "System Requirements" on page 10 must be installed.
To install a Solaris system patch, use the procedure outlined in the following example for Patch #106327-08. The patch in this example is compressed in zip format and was downloaded from http://sunsolve.sun.com.
Log on with root access rights:
su -
Create a temporary directory for unpacking the compressed patch file, for example, /tmp/patches.
mkdir /tmp/patches
Copy the compressed patch file to this directory and unpack it there:
unzip 106327-08.zip
Install the patch using the command patchadd:
patchadd 106327-08
After successful installation of the patch, you can remove the temporary directory:
rm -rf /tmp/patches
|
|
To display a list of the patches already installed on your system, use the command showrev -p or patchadd -p. To deinstall a patch, use the command patchrm. |
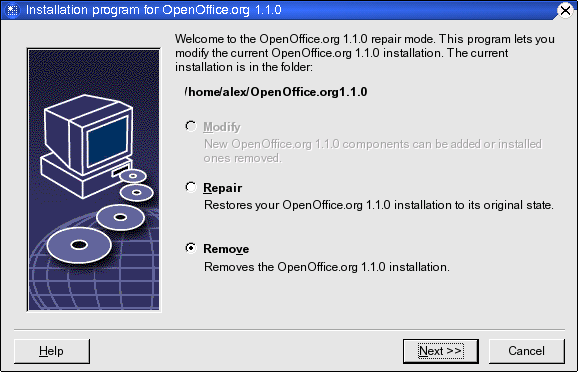
To modify, repair or remove an existing OpenOffice.org installation, run the setup application found in your local directory.
If you want, you can also run the setup application found on the installation CD.
|
|
The Modify option adds or removes components from an existing installation, or modifies file type assignments. More information on choosing components is found in chapter "" on page
The Repair option repairs a damaged installation, by restoring system registry entries, and reinstalling program files that were deleted.
The Remove option deletes OpenOffice.org system registry entries, and removes all OpenOffice.org program files. The files that you created or altered are not deleted.
|
|
If you want, you can also choose to delete all configuration and user files from the OpenOffice.org installation directory. Under Windows, some files can only be deleted after system restart. |
To remove the Server Installation on a network, delete the OpenOffice.org folder on the server. All Workstation Installations based on this Server Installation will then be inoperable.
You can pass the following parameters to the setup program to perform specific actions:
Use setup -net or -n to start the Server Installation.
Use setup -D:destination_path to install OpenOffice.org into the directory that specify in the path.
Use setup -F:application_name to run the application that you specify immediately after the installation.
By starting the OpenOffice.org software from the command line you can assign various parameters, with which you can influence the performance. The use of command line parameters is only recommended for experienced users.
|
|
For normal handling, the use of command line parameters is not necessary. A few of the parameters require a deeper knowledge of the technical background of the OpenOffice.org software technology. More information on this topic can be found at www.openoffice.org. |
Under Windows:
Select Run from the Windows Start menu
Type the following text in the Open text field
{install}\program\soffice.exe {parameter}
Replace {install} with the path to your installation of the OpenOffice.org software (for example, C:\Program Files\Office)
Where required, replace {parameter} with one or more of the following command line parameters.
click OK.
Under UNIX--based systems:
type the following line of text on the commandline:
{install}/program/soffice {parameter} and press Return:
Replace {install} with the path to your installation of the OpenOffice.org software (for example, ~/office). Where required, replace {parameter} with one or more of the following command line parameters.
|
Parameter |
Meaning |
|
-help / -h / -? |
Lists the available command line parameters in a dialog box. -help shows a long help text, -h shows a short help text. |
|
-writer |
Starts with an empty Writer document. |
|
-calc |
Starts with an empty Calc document. |
|
-draw |
Starts with an empty Draw document. |
|
-impress |
Starts with an empty Impress document. |
|
-math |
Starts with an empty Math document. |
|
-global |
Starts with an empty global document. |
|
-web |
Starts with an empty HTML document. |
|
-minimized |
Starts minimized. The splash screen is not displayed. |
|
-invisible |
Starts in invisible mode. Neither the start-up logo nor the initial program window will be visible. However, the OpenOffice.org software can be controlled and documents and dialogs opened via the API. When the OpenOffice.org software has been started with this parameter, it can only be ended using the taskmanager (Windows) or the kill command (UNIX based systems). It cannot be used in conjunction with -quickstart. More information is found in the OpenOffice.org Developer's Guide. |
|
-norestore |
Disables restart and file recovery after a system crash. |
|
-quickstart |
Activates the Quickstarter. The splash screen is not displayed. |
|
-terminate_after_init |
Registers some UNO services and ends. The splash screen does not appear. More information is found in the OpenOffice.org Developer's Guide. |
|
-accept={UNO string} |
Notifies the OpenOffice.org software that upon the creation of "UNO Acceptor Threads", an "UNO Accept String" will be used. More information is found in the OpenOffice.org Developer's Guide. |
|
-userid={user id} |
Specifies a user's directory that is used instead of the data from the soffice.ini, bootstrap.ini and sversion.ini files. More information is found in the OpenOffice.org Developer's Guide. |
|
-p {filename1} |
Prints the files {filename1} {filename2} ... to the default printer and ends. The splash screen does not appear. If the file name contains spaces, then it must be enclosed in quotation marks. (for example, "C:\My File.sxw") |
|
-pt {Printername}
|
Prints the files {filename1} {filename2} ... to the printer {Printername} and ends. The splash screen does not appear. If the file name contains spaces, then it must be enclosed in quotation marks. (for example, "C:\My File.sxw") |
|
-o {filename} |
Opens {filename} for editing, even if it is a template. |
|
-view {filename} |
Creates a temporary copy of {filename} and opens it read-only. |
|
-n {filename} |
Creates a new document using {filename} as a template. |
|
-nologo |
Disables the splash screen at program start. |
|
-display {display} |
Sets the DISPLAY environment variable on UNIX based platforms to the value {display}. This parameter is only supported by the start script for the OpenOffice.org software on UNIX based platforms. |
|
-headless |
Starts in "headless mode" which allows using the application without user interface. This special mode can be used when the application is controlled by external clients via the API. |
The registration dialog window appears the second time you start OpenOffice.org. You can also access this dialog by choosing Help – Registration in any OpenOffice.org application.
You can modify the registration dialog by editing the common.xml file in the {installpath}/share/config/registry/instance/org/openoffice/Office/ directory. To permanently deactivate the registration dialog, set the value of RequestDialog under Registration to 0. To permanently deactivate the registration menu command, set ShowMenuItem under Registration to false:
<Registration>
<RequestDialog cfg:type="int">0</RequestDialog>
<ShowMenuItem cfg:type="boolean">false</ShowMenuItem>
</Registration>
The OpenOffice.org software can be extended using the tools in the OpenOffice.org Software Development Kit (SDK). Typically, these extensions include shared libraries, Java class files, OpenOffice.org Basic scripts, or new interface type descriptions.
|
|
For more information on creating extensions for the OpenOffice.org software, refer to the OpenOffice.org Developer's Guide. |
The special package manager pkgchk is installed and registered by the OpenOffice.org setup application. It is located in the {office_install}/program directory. The syntax for using the package manager is:
pkgchk <switches> [package1 package2 ...]
Switches:
|
-s or --shared |
Checks/installs shared components |
|
-r or --renewal |
Re-installs all packages (in case of cache errors) |
|
-v or --verbose |
Prints verbose output during installation |
|
-l <file> or --log <file> |
Writes to a custom log <file> |
|
--strict_error |
Terminates package installation immediately when an error occurs |
|
--supersede_basic_libs |
Overwrites existing basic library entries of the same name |
|
-h or --help |
Prints a short help text |
If you run pkgchk without any parameters, only the {office_install}/user/uno_packages directory is scanned for the following changes:
If a new extension package file is found, the extension is installed for the current user.
If an extension package file for an installed extension is missing, the corresponding extension is de-registered.
If an extension package file for an installed extension differs from the original extension package file, the corresponding extension is updated.
If you start pkgchk with a package file name and path as parameter, the corresponding package file is copied to the {office_install}/user/uno_packages directory and installed.
If you start pkgchk with -shared or -s and a package file name and path as parameter, the corresponding package file is copied to the {office_net_install}/share/uno_packages directory and installed for all users of a network installation (shared).
Close all OpenOffice.org windows.
Ensure that you exit all OpenOffice.org applications, including the Quickstarter.
Do one of the following:
To install an extension package, copy the package to {office_install}/user/uno_packages.
To update an extension package, copy the updated package to {office_install}/user/uno_packages, and ensure that it overwrites the existing package.
To remove an extension package, delete the package from the {office_install}/user/uno_packages directory.
Run pkgchk in the {office_install}/program directory.
The package manager tool scans the {office_install}/user/uno_packages directory for extension packages and performs all necessary installation or de-installation steps. After the package is installed, do not remove the package file from the directory. You can find a list of all actions performed by the package manager in {office_install}/user/uno_packages/cache/log.txt.
Close all OpenOffice.org windows.
Ensure that you exit all OpenOffice.org applications locally and on the Server. This includes the Quickstarter.
Do one of the following (where {office_net_install}/share is the shared directory of the Server Installation):
To install an extension package, copy the package to the {office_net_install}/share/uno_packages directory.
To update an extension package, copy the updated package to the {office_net_install}/share/uno_packages directory, and ensure that it overwrites the existing package.
To remove an extension package, delete the package from the {office_net_install}/share/uno_packages directory.
Run pkgchk -shared in the {office_net_install}/program directory.
The package manager tool scans the {office_install}/user/uno_packages directory for extension packages and performs all necessary installation or de-installation steps. After the package is installed, do not remove the package file from the directory. You can find a list of all actions performed by the package manager in {office_install}/user/uno_packages/cache/log.txt.