
Tutorial : Configuring MyFaces 2 to run on Google App Engine with Eclipse
Google App Engine support for MyFaces 2 made trunk and it is released with MyFaces Core 2.0.0-beta-3. In this tutorial, I will explain how to use it. I assume that you have basic Eclipse, JSF and Facelets knowledge.
You can find IDE-independent instructions here. Additionally, there is a tutorial for IntelliJ IDEA here.
Here is the complete source code and the Eclipse project of the example application (which I took from Facelets Tutorial) that I configured to run on Google App Engine.
I deployed the application explained in this tutorial to: http://myfaces2-tutorial.latest.aliok-com-tr-test.appspot.com/guess.jsf
In order to run Myfaces on Google App Engine, you need to complete the steps below. Configuration explained in this document is tested with Google App Engine 1.3.2.
Creating the Project and Placing the Jars
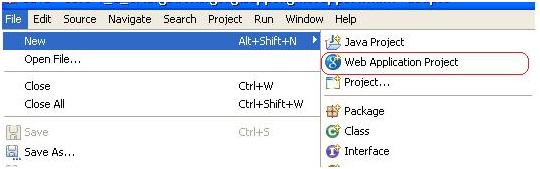
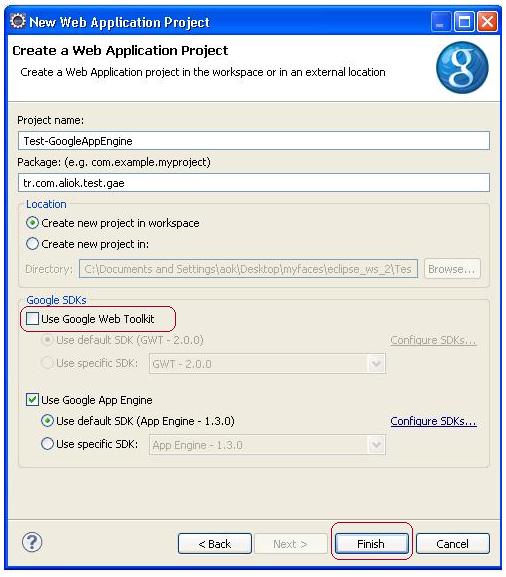
- Create a Web Application Project (uncheck "Use Google Web Toolkit" if you won't use GWT)
- Download Myfaces Core here. We need "MyFaces Core 2.0.0-beta-3" or a later version. Extract files below and put them into war/WEB-INF/lib.
- lib/myfaces-api-2.x.x.jar
- lib/myfaces-impl-2.x.x.jar
- lib/commons-logging-1.x.x.jar
- lib/commons-beanutils-1.x.x.jar
- lib/commons-collections-3.x.jar
- lib/commons-digester-x.x.jar (I tested with version 1.8)
- lib/commons-discovery-0.x.jar
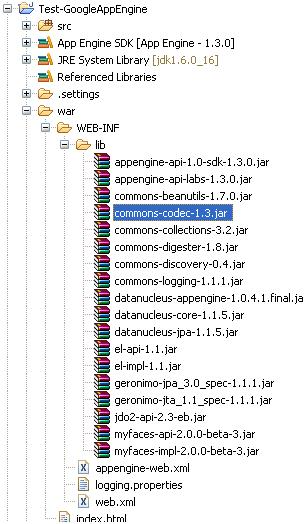
Here is the war/WEB-INF/lib so far:
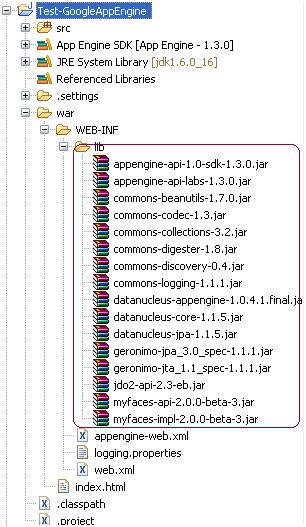
Please note that some jars (i.e. jdo2-api-2.3-eb.jar) are put by Google App Engine Eclipse plugin when the project is created.
- Download el-api and el-impl and put them into war/WEB-INF/lib. You can see the war/WEB-INF/lib so far below.
- Add lines below into war/WEB-INF/web.xml.
<web-app ... ... <!-- We need to set annotation lifecycle provider manually as org.apache.myfaces.config.annotation.NoInjectionAnnotationLifecycleProvider. Other providers use some classes that are restricted on Google App Engine. --> <context-param> <param-name> org.apache.myfaces.config.annotation.LifecycleProvider </param-name> <param-value> org.apache.myfaces.config.annotation.NoInjectionAnnotationLifecycleProvider </param-value> </context-param> <!-- Need to set a secret to avoid javax.crypto.BadPaddingException. "param-value" must be Base64 encoded. More details: http://wiki.apache.org/myfaces/Secure_Your_Application --> <context-param> <param-name>org.apache.myfaces.SECRET</param-name> <param-value>NzY1NDMyMTA=</param-value> </context-param> <!-- Facelets configuration fragment --> <context-param> <param-name>javax.faces.DEFAULT_SUFFIX</param-name> <param-value>.xhtml</param-value> </context-param> <servlet> <servlet-name>Faces Servlet</servlet-name> <servlet-class>javax.faces.webapp.FacesServlet</servlet-class> </servlet> <servlet-mapping> <servlet-name>Faces Servlet</servlet-name> <url-pattern>*.jsf</url-pattern> </servlet-mapping> ... </web-app> - Make sure that you use the JSF 2 header in your faces-config.
<?xml version="1.0" encoding="UTF-8"?> <faces-config xmlns="http://java.sun.com/xml/ns/javaee" xmlns:xsi="http://www.w3.org/2001/XMLSchema-instance" xsi:schemaLocation="http://java.sun.com/xml/ns/javaee http://java.sun.com/xml/ns/javaee/web-facesconfig_2_0.xsd" version="2.0"> ... </faces-config> - Add the following line into war/WEB-INF/appengine-web.xml:
<sessions-enabled>true</sessions-enabled>
- Now you can add your stuff (pages, beans, etc.). You cannot use JSP as view technology on Google App Engine. You must use Facelets, which is the default view technology in JSF 2.
Deploying to App Engine Development Server (Your Local Server)
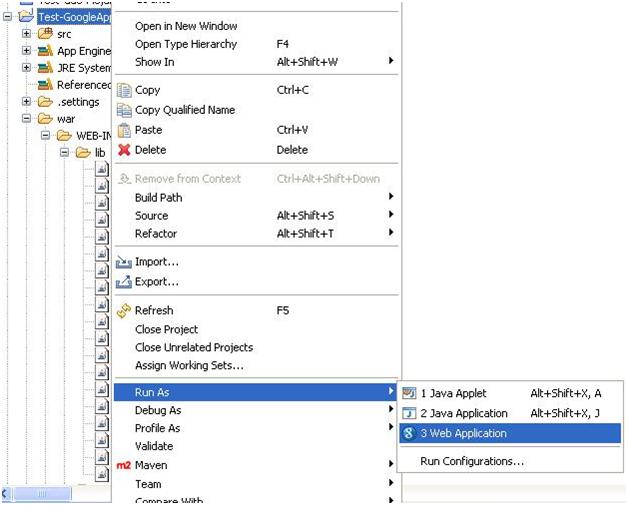
Right click on the project and select "Run As -> Web Application". This will start Google App Engine development server. You can see the port information on the console (default is 8888).
Deploying to Google App Engine
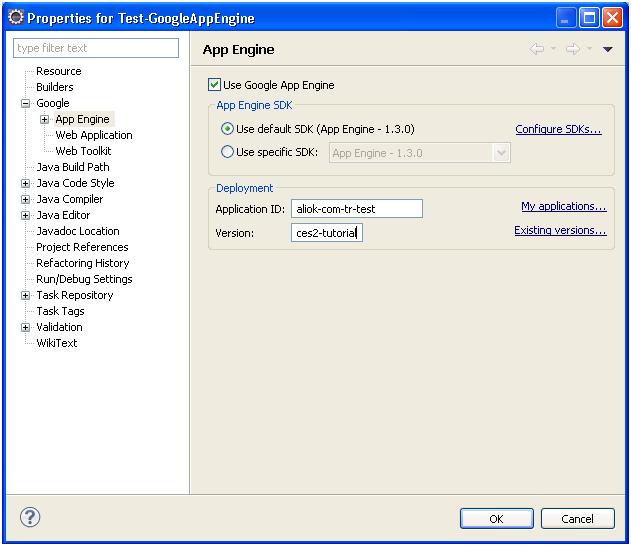
- Right-click on the project and select "Properties".
- Select "Google"->"App Engine".
- Select "Use Google App Engine" if not selected, and type your "Application ID". Press OK and close the dialog.
- Right click on the project and select "Google" -> "Deploy to App Engine"
- Enter your account information, and the application will be deployed on your-app-id.appspot.com.
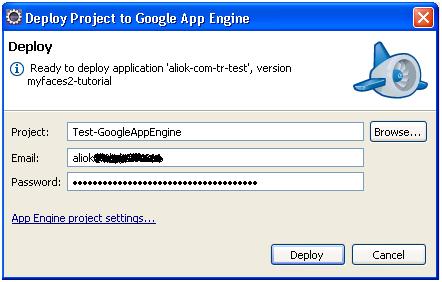
- The URL for the application I deployed is : http://myfaces2-tutorial.latest.aliok-com-tr-test.appspot.com/guess.jsf